Wednesday 31 August 2022

Join the 2022 Sell Something Challenge

2022 Sell Something Challenge

We live in the era of the side hustle. The passive revenue stream. The start-your-own-business movement. And there’s a reason: Selling online isn’t all that hard. Making online sales is no longer just for established businesses.

You can do it! You probably have at least one thing you’d like to sell. If not, don’t worry, we have some ideas for you.

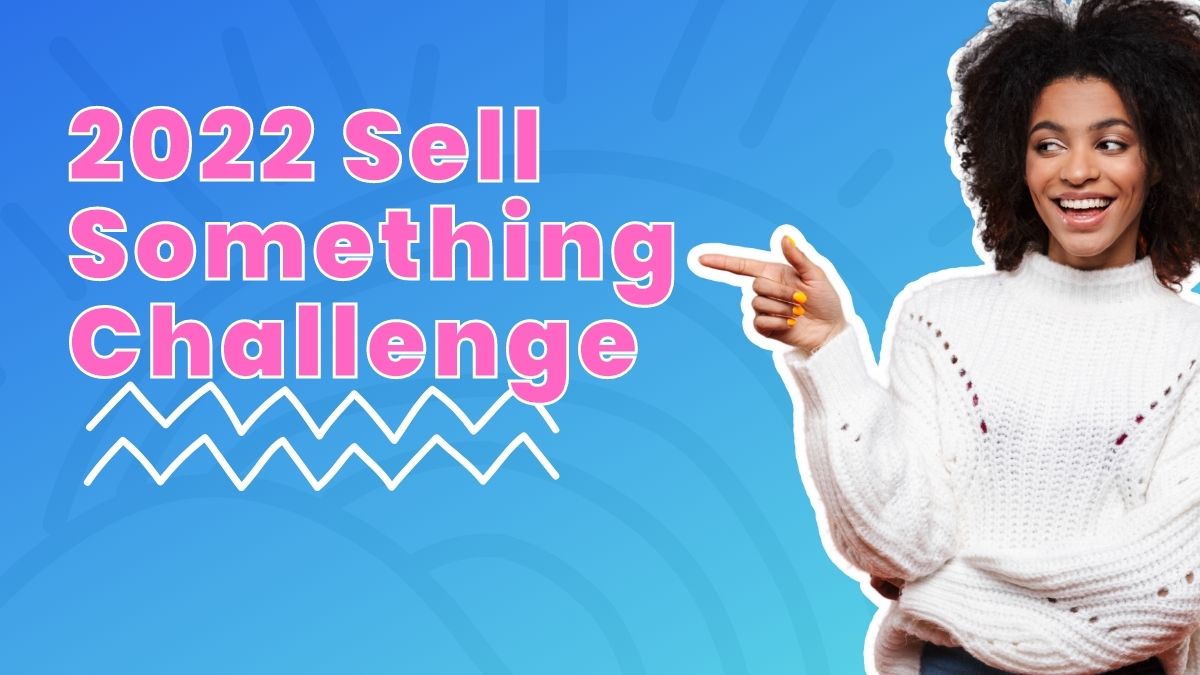
And now is the perfect time. For the month of September, AWeber is running its Sell Something Challenge. Want to join?

Sign up for the challenge

[aweber listid=309777 formid=1343946083 formtype=webform]

We’ll teach you everything you need to know to make your first sale AND you’ll get a free month of AWeber Pro when you sell something.

So read on and learn how to empower yourself with the knowledge that can change your future!

Why learn to sell online?

Well, other than the obvious — you get to make a little money — there are a few other benefits to knowing how to sell things online. You’ll:

  1. Earn passive income on the side
  2. Learn a new tech skill (and put it on your resume)
  3. Be able to quickly set up new revenue streams when you have ideas in the future
  4. Make more use out of your existing tools (like AWeber)
  5. Get one month of AWeber Pro for free (if you’re currently on the free plan)

… which brings us to the details of the challenge.

The 2022 Sell Something Challenge

2022 Sell Something Challenge

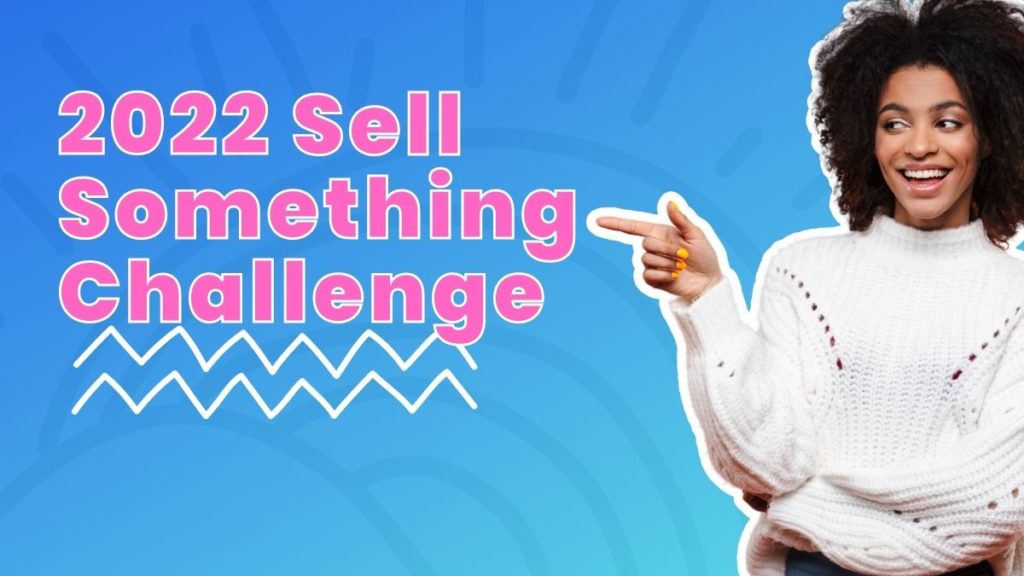
What is it: A free challenge running from Thursday, September 1st through Friday September 30th, 2022.

What you’ll learn: How to use AWeber’s landing page builder and Ecommerce tools, along with how to develop ideas for digital products and how to set them up to sell and be fulfilled automatically - while you go do other things (sip a margarita on the beach, play with your kids, explore how to make cheese… whatever you’re into).

Here’s the small print: If you sign up with an free AWeber plan, or you already have a free plan, when you set up a landing page using our Ecommerce element and make one sale, we’ll send you a promo code for a free month of AWeber Pro for up to 500 subscribers. Your promo code will expire on October 31st, so use it as soon as you get it.

Ready to join? Sign up for the challenge now.

We’d love to hear your plans and to help you out in our Facebook community! Or tell a friend about how easy it was to set up your store. Who knows, you might help someone else get started selling online, too.

Why sell with AWeber?

There are three main reasons why you should sell with AWeber: simplicity, control, and low-cost.

Simple-to-use

AWeber offers over 100 page templates, integrations with Stripe and PayPal (for online payment processing), and a landing page builder that one marketer called “the easiest one I’ve ever used with all the functionality I need.” 

Quite simply, no matter how tech savvy you are, you can make a sales page in one day.

You’re in control

Promoting your product or service on a social media platform or listing site can be good for visibility. But, ultimately, you are subject to the rules and algorithms of whichever platform controls your listing. They can shut you down at any time, with no warning. However, with AWeber, your pages, your products, and your promotions are 100% in your control.

The lowest cost

You can set up your sales pages with any AWeber plan — that means getting up and running is completely free. Squeaky-clean, no-strings-attached, no credit card required, forever free

AWeber also won’t charge you an arm and a leg when you make your sales. You see, online listing sites often charge really high fees — up to 20% from your sale. That means either you’re giving up a cut or you’re passing the cost onto your purchaser. AWeber’s fees are the lowest in the industry at 1%, 0.6% if you have a Pro account (plus Stripe’s fees of 2.9% + 30¢ per charge).

So if you sell an ebook for $15, you’re walking away with $14.12. The same book sold elsewhere could leave you with only $12. The same book sold six times will get you $86.19 versus $72 ($14 difference!). High fees start to add up.

We’ve done the math. Selling online with AWeber Ecommerce is the best way to walk away with the most money in your pocket.
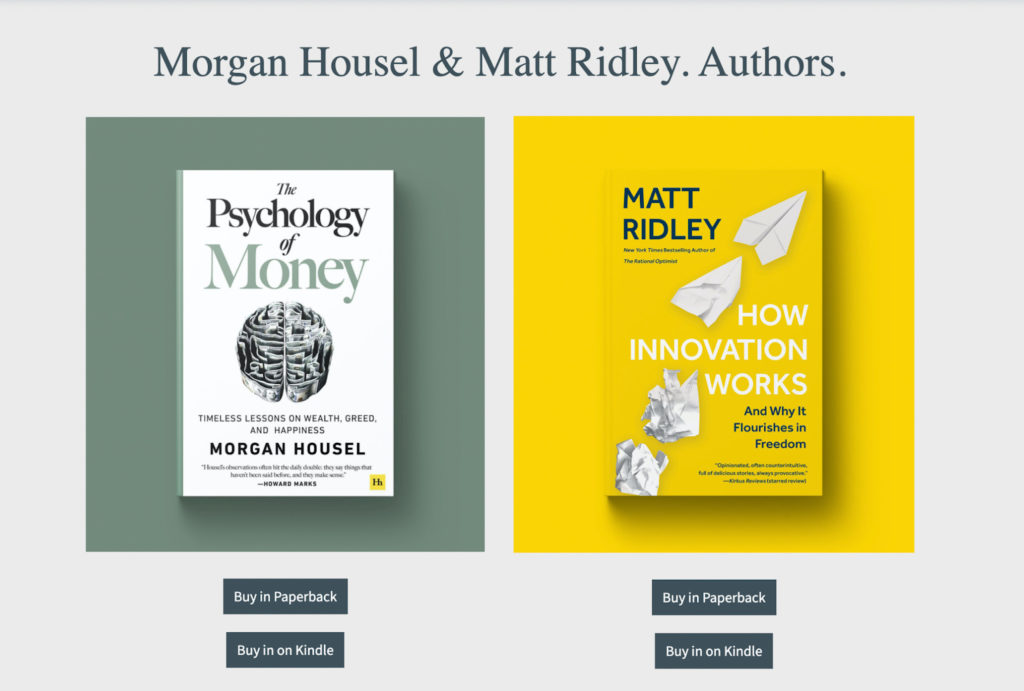
What to sell

The purpose of The Sell Something Challenge isn’t to start a business or even get your side-gig going — although it would be great if you did that eventually. The purpose is to learn how to sell online, easily and affordably without using marketplaces or listing sites.

So don’t overthink the first thing you sell. Start simple. Here are ten ideas that may help inspire you to sell something uniquely yours:

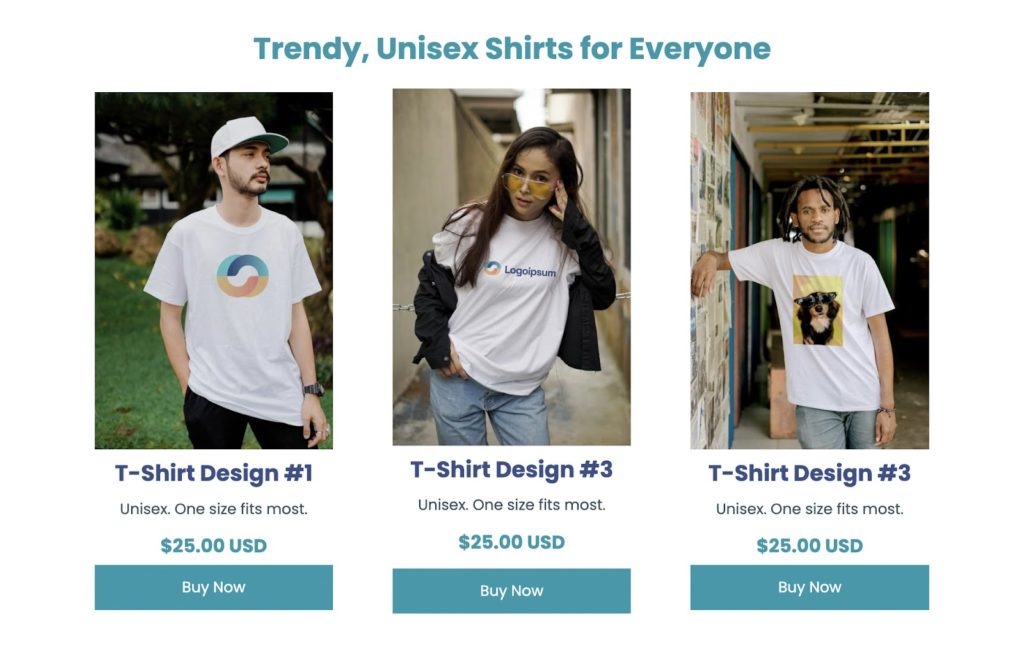
Sell something physical

  1. A tool in your garage you no longer use
  2. Used books
  3. Sketches, paintings, photography, etc.
  4. Resell used clothing or furniture from a thrift store

Note: If you sell something physical, pay close attention to when it’s sold and remove it from your page. This process currently can’t be automated.

Sell something digital

  1. An online course with your expert advice
  2. A digital book or short story
  3. Expert content given via blog or email
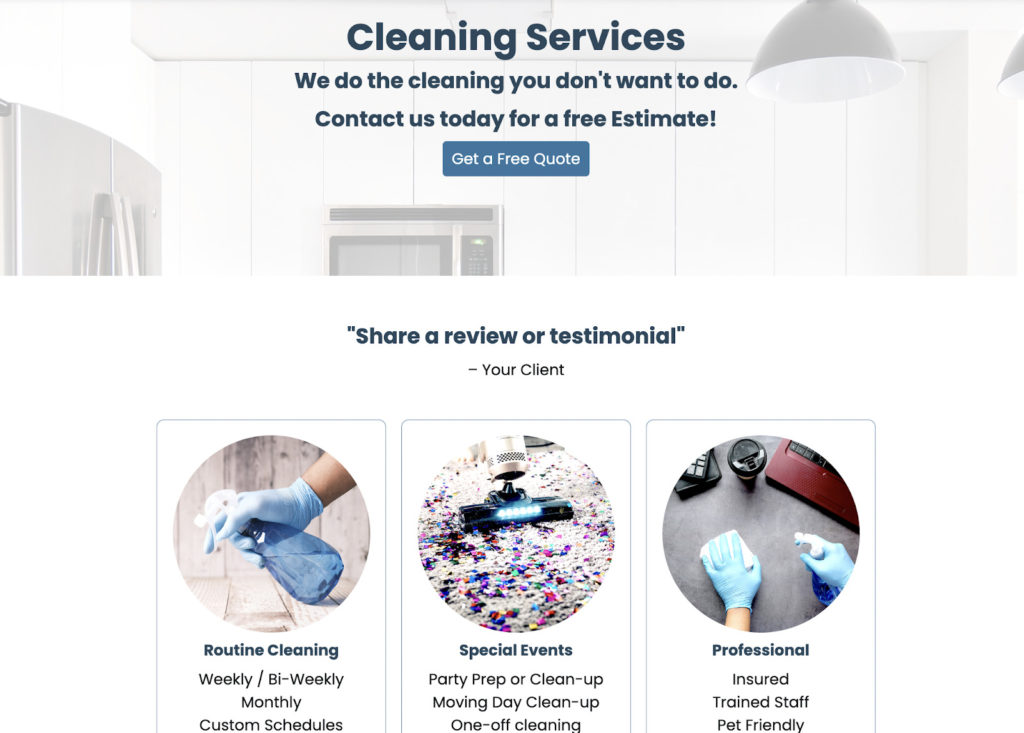
Sell services

  1. Freelance work like writing, editing, or design
  2. 1:1 consulting in your area of expertise
  3. Local physical services offered in your area

Whatever you decide to sell, give it a name, a short description, and a picture — either of the physical thing you’re selling or to represent what you’ll be doing.

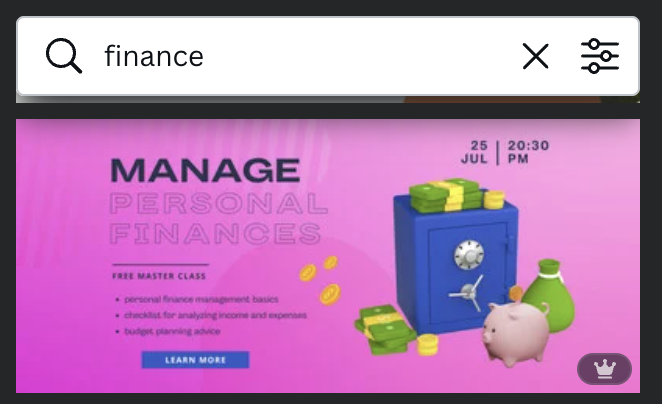
For example, if you’re going to offer consulting services, use a headshot or search for a relevant stock photo in the AWeber image gallery or on Canva. Here's one from Canva:

A search for "finance" in Canva.

Don’t forget to keep it simple for the challenge. We want to get you up and running — and even making a sale — today!

How to set up your sales page

Selling online involves two things: creating a sales page and marketing your product or service. Here we’ll cover creating your sales page. It only takes five simple steps to get a sales page up in AWeber (you can set up a free account if you don’t already have one).

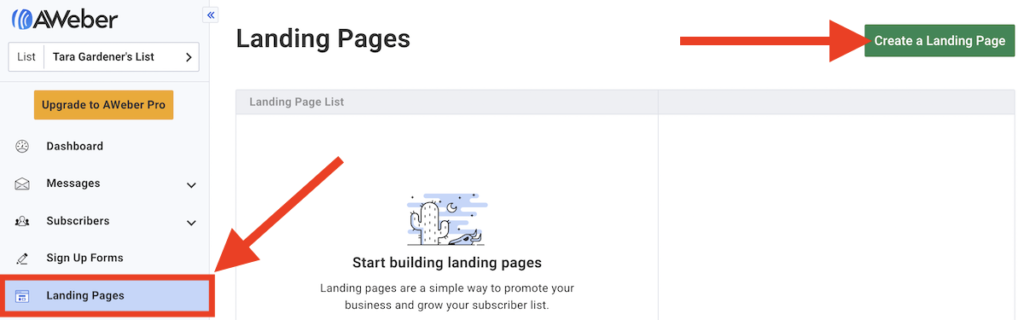
1. Create a landing page

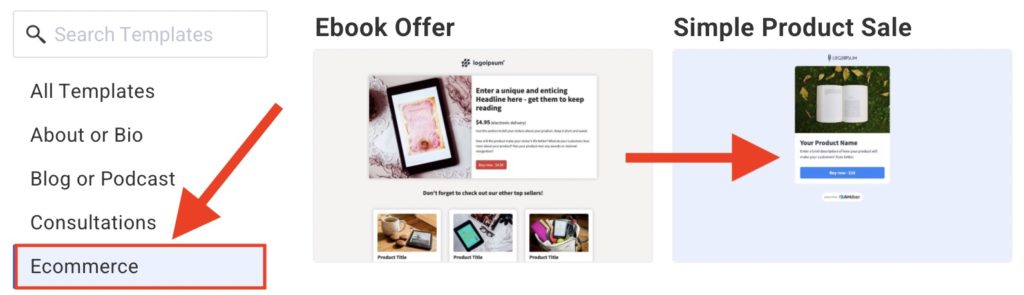
Click on “Landing Pages” in the side panel of your account and then click “Create landing page.” You can filter the templates by ecommerce or scroll to choose one (you don’t need an ecommerce-specific template to make a sale).

Screen shot showing where to create a landing page in AWeber's platform

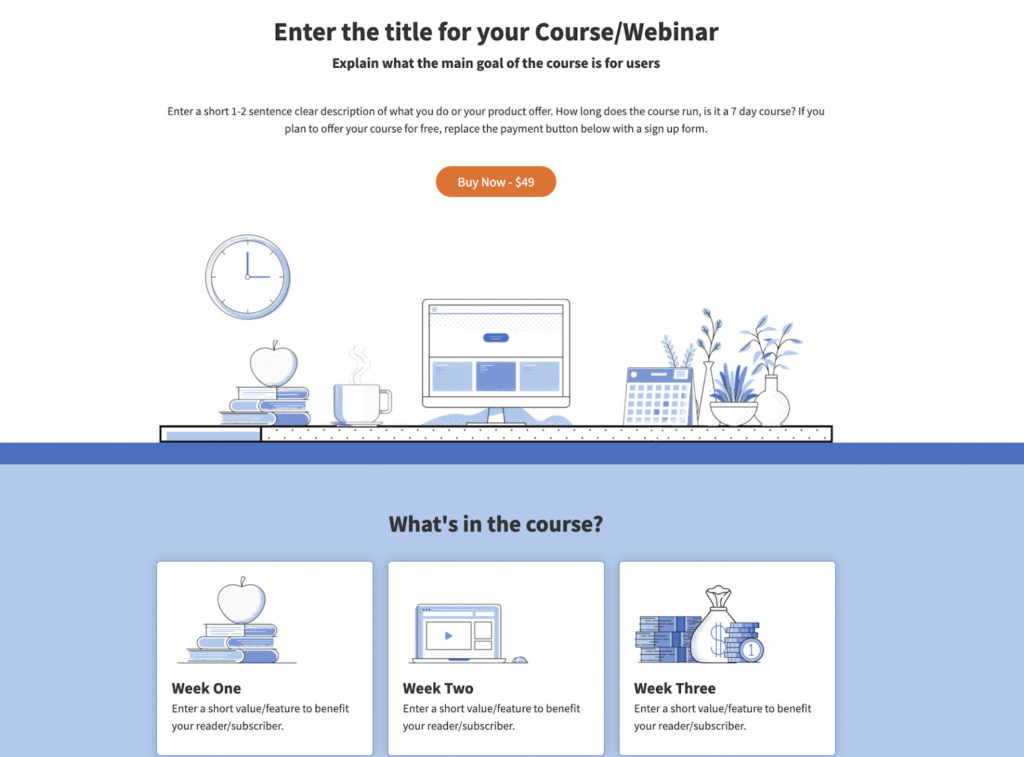
A popular template is the “Simple Product Sale.” Click “Choose” on the template to copy the page into your drafts.

In the AWeber dashboard, online store templates for ecommerce including an ebook offer and a simple product sale.

2. Add sale details

Add the name, description, and imagery representing whatever you’ve decided to sell. You should always include a picture, especially if you’re selling a physical product.

Keep the description relevant to the size of what you’re selling. For example, you may want to lay out what someone will learn throughout a several-weeks-long course. But if you’re reselling something from your house, a picture and a short description is plenty.

3. Add a sale button

Drag and drop the ecommerce element from the left onto your sales page. This will give you a button (though there may already be one on your template). Update the button’s text. For example, you could say “Buy now – $15” or “Get Your Course.”

4. Connect to Stripe

To charge for your product or service, you’ll need to connect to a Stripe account. When you’ve selected your ecommerce button, you should see a prompt to connect Stripe. If you don’t already have a Stripe account, don’t worry. You can set one up in about five minutes.

Popup in AWeber's platform showing how to connect to Stripe

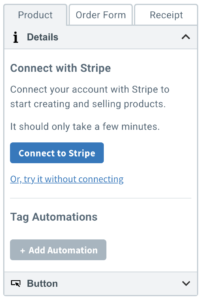
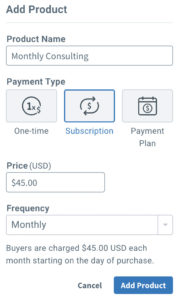
Once Stripe is connected, you can create new products, subscriptions, payment plans and prices directly in AWeber. No need to switch back-and-forth to multiple tabs.

5. Configure sale button settings

Add a “product” to your button (a digital product or service is also called a product). Give it a name, price, and decide whether you’ll charge just once, or offer a subscription or payment plan.

configure sale button settings in AWeber's platform

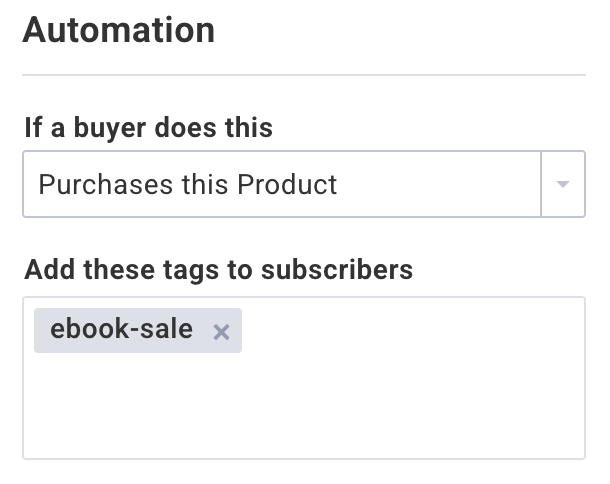
Under “Tag automation,” tag anyone who purchases with something like ebook-sale. Then you can track and market to who you sold to later.

Under Automation in the ecommerce tool in AWeber, you can add tags like ebook-sale when someone purchases the product.

Review the order form and double check that the prices and description match what you’re selling.

You can choose to show a receipt after the sale or redirect to another page. If you redirect, you can show a thank you page or send purchasers to a landing page that contains the content they’ve bought (like a digital book or course).

6. Review and publish

Check your page’s title and preview the page to make sure it looks like you want it to. Then click “Save and exit” and then “Publish” to make your page live on the web (yep, it’s really a live sales page at this point!)

A GIF of Jimmy Fallon dancing.

If you want a custom domain — exampleproduct.com instead of mypage.aweb.com/p/1283…— you can buy one directly from your AWeber dashboard. Buy and connect your new domain on your landing page’s settings.

That’s it! You now have a fully functioning sales page that you can share online or offline. It’s time to put “web designer” on your list of skill sets.

Sales page ​​templates

Want to see a few options for the templates that can get you up and running right now? Scan through these five for some inspiration and click on any to copy it directly into your account.

Online course

The page template for an online course. Click to copy it into your AWeber account.

Ebook offer

Book page template for an online store. Includes options to buy in paperback or on kindle. Click to copy it into your AWeber account.

Product sale

A product page template offering three pictures, prices, and buy now buttons. Click to copy it into your AWeber account.

Services

A services page template with cleaning services as an example. Click to copy it into your AWeber account.

Crowdfunding

Crowdfunding page template for an online store. Includes donate button, description prompts, and an image.

Subscription
Subscription page template for an online store. Includes three subscription tiers, join buttons, and prices.

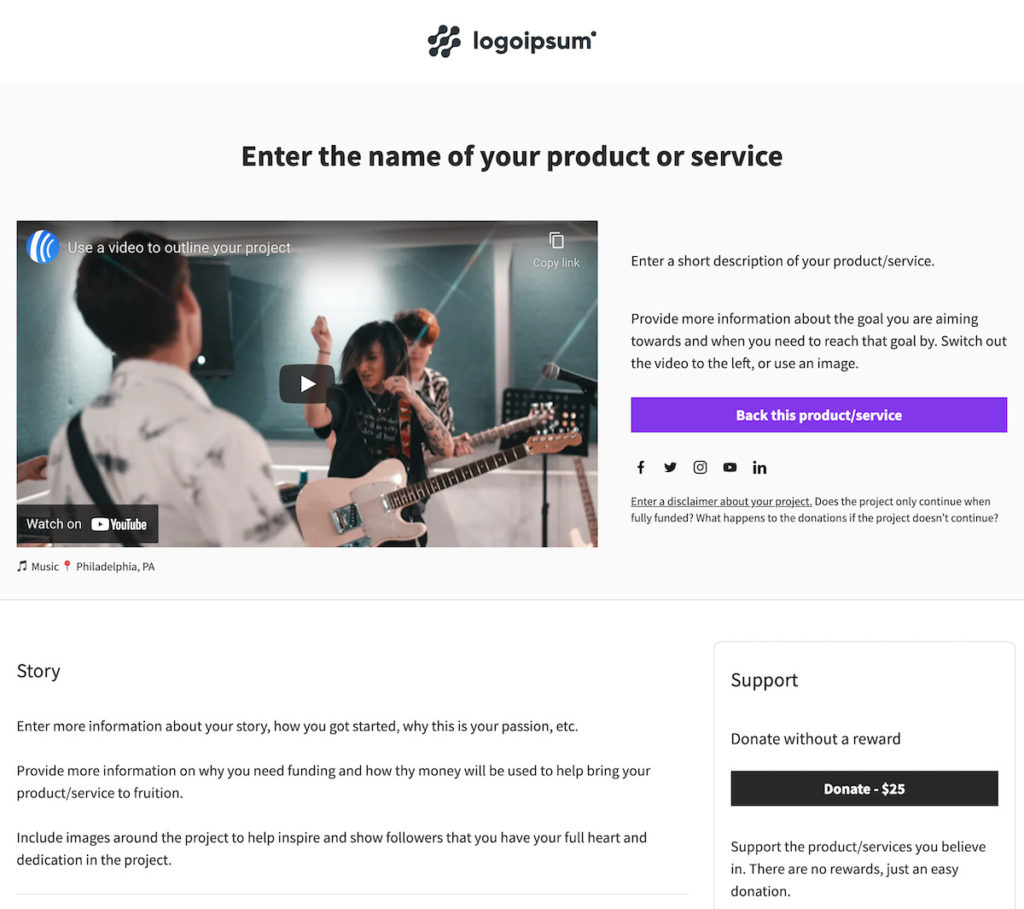
Click “Ecommerce” on the left when you’re choosing a template to see all the options, or check out our public template gallery.

How to make the sale (marketing 101)

Now that you have your sales page set up, it’s time to work on actually making that first sale. It’s time for some marketing

Marketing comes down to two things:

  1. Who would want to buy my thing?
  2. Where do they learn about new products and services?

There are four easy ways to start your sales journey, depending on the time and resources you have to spend. Try these tactics to make your first sale:

Tell your friends and family

https://twitter.com/ClickPop/status/1424764655688368130

As you’re starting your sales journey, the people who love you are likely to be on board with helping out. Ask your closest connections if they’ll support you by buying your thing, especially if it’s fairly affordable and useful for them.

Find buyers on social media

If you have an existing audience on Facebook, Twitter, LinkedIn, TikTok, or anywhere else, promote your new product to them. Give a quick pitch on the benefits, uses, and how their lives will definitely be better after they buy your product.

If you don’t have an existing social media audience — or not one that’s used to being sold to — it’s time to start.

If you’re comfortable creating videos, I recommend starting with TikTok or YouTube and cross-promoting your videos. Get on screen and work to truly educate your audience about what you’re selling and the reasons they should buy it.

Not cool with video? That’s OK. Instead, try some Facebook groups, LinkedIn, or even Twitter threads. The key here is to search for people who could benefit from what you sell. Try finding popular posts and add answers or smart comments to them.

For example, let’s say you sell a course about building a cabinet. Find the woodworking community by searching for “woodworking,” “DIY,” “home design,” etc. Then find popular posts about building things and say something like “It took me just two days to build my own cabinet. So I made a course on how to do it.” (Add a picture of your cabinet and a link to your course.)

No matter how you promote on social media, don’t forget that everyone can tell if you’re making a sales pitch only. So be authentic, helpful, friendly, and engaging.

Send an email

Whether you have a list of thousands from another venture or just your own personal contact list, you can use email marketing to send people to your sales page. Figure out who on your list will be interested in what you offer, and send a short promotional email letting them know what you’re selling.

Pay for an ad

It might seem crazy to pay first before earning any money. But you can actually set up some pretty affordable advertising with Facebook Lead ads. And if you sell something fairly expensive, it can pay off.

Selling an artistic creation like a painting or sculpture for hundreds of dollars? You might want to try just $5-10 in Facebook Lead ads to get your beautiful piece in front of more eyes. It’s quite easy to find your audience here, too.

Keep pushing towards your first sale, and track what you learn along the way. When it’s time to make sale #2 – or 2,000 – you’ll have the information you learned in this challenge to assist you.

Additional resources

How to Sell Online with Ecommerce Landing Pages

Grow Your Income with Subscriptions & Payment Plans

5 Steps to Promote and Sell Online Courses

Landing Page Template Gallery

10 Best Ecommerce Tools to Sell More with Email Marketing

Get started now

The best time to learn to sell online is today. Start now with a free AWeber account. Connect Stripe, pick a template, and make a sale today! Don’t forget to tell us how it went in the Facebook community.

The post Join the 2022 Sell Something Challenge appeared first on AWeber.


from AWeber https://ift.tt/h0V8byP
via IFTTT

17 social media management tips for productivity and organization

Managing social media means you need a variety of skills to become successful. You have to juggle multiple plates and wear several hats, from content ideation to video production—basically, you have a lot to handle.

Here are 17 social media management tips to help you stay productive and organized:

1. Identify the best platforms for your brand

From longstanding favorites like Instagram and YouTube to newer apps like TikTok and BeReal, there are so many social media platforms to choose from. And with monthly updates and new features, it can be tempting to try everything, but you need to choose the right social media channels for your business.

Consider your brand’s goals, resources, current content types, your audience, your competitors and the industry you’re in. Use this information to form a strategic approach and identify the best platforms for your brand.

Continue your research as you find the platform that works best for you. For example, if your brand uses Instagram, seek platform-specific advice by searching “social media management tips for Instagram.”

2. Set your social media goals

Set social media goals that are measurable and align with the overall business objectives of your brand.

Use the SMART goal-setting framework to guide you. The acronym stands for:

  • Specific: Your goal should be clear and defined. State what you will accomplish specifically.
  • Measurable: You need to track any social goal with numbers. This is where metrics and key performance indicators (KPIs) come into play. Metrics are just numbers, but KPIs bring context and meaning to your data.
  • Achievable: Do you have the necessary resources (time, budget, creatives, etc.) to achieve your goals?
  • Realistic: Dream big, but within reason. Avoid promising results you can’t produce (think quadrupling conversions in one week).
  • Time sensitive: Give yourself a timeframe (monthly, quarterly or annually) to reach your goals.

Once you set your goals, identify the key performance indicators (KPIs) you’d like to use to measure your success. Your KPIs are contingent on each goal so choose those metrics after confirming your goals. For example, if you wanted to increase your brand engagement, likes, comments, shares and mentions could be potential KPIs.

3. Create a routine for your day or week

Routines make the world go round. Create a productivity regimen to help organize your daily, weekly and monthly workload. A classic to-do list is always effective—whether it’s using a physical planner or an iOS app. Block off time on your calendar and dedicate it to specific tasks or projects. Experiment with productivity tools like Asana, Todoist or Hive— there are so many to choose from, so don’t be afraid to try something new until you find what works best.

4. Batch similar tasks

Think about which tasks are similar so you can strike everything off your to-do list. For example, if you need to write social copy for several posts across several platforms, do it together. You can do the same for pretty much anything from creating social graphics to scheduling content.

5. Use a content calendar to visualize your efforts

A content calendar serves as a great visual reminder of what you need to do to accomplish your goals, but it can also help you save time and avoid social media burnout.

Use the calendar to plan out your content type, along with where and when you would like to post it. Just like your personal or business calendar, a content calendar visualizes your efforts.

Month view in Sprout Social's content calendar

6. Upload and schedule social media posts with time-saving tools

Work smarter, not harder with social media scheduling tools. A social media scheduling tool is software that assists with scheduling your posts across multiple accounts and platforms. You save time because you can upload content and assign a date for publishing instead of having to do everything within the app.

With social media management platforms like Sprout, you can schedule your posts in advance, upload content and track KPIs all in one place.

Start your free Sprout trial

7. Understand your best times to post

It’s not just what you post that matters, but when. The best times to post on social media vary by network, content type and your brand’s audience and industry. Take a deep dive into research and review your brand’s social media data and analytics to decipher the best timing trends.

For example, if you notice your audience engages with your LinkedIn content in the afternoon more than in the morning, noon until 4 p.m. could be a sweet spot for posting.

8. Revisit your social media content mix

Variety is truly the spice of life. You need a mix of content to keep your audience engaged and grow your social presence. Consider adjusting your content mix based on your goals, resources, budget or brand identity.

To give you a little extra help, we created an interactive quiz to help you find the right social media content mix for your brand.

9. Create an authentic brand experience for your audience

The heart of social media is human connection, so it’s no surprise that audiences are seeking brand authenticity. According to the Sprout Social Index™,  34% of consumers want to see authentic, less produced videos from brands on social.

Your brand can shape a genuine brand experience by studying and listening to your audience. What do they care about? Which posts do they like the best? What are they talking about online? Cater to these questions with the content you share.

10. Add user-generated content to your social media content plan

Amplifying user-generated content is a great way to shout out your customers, while also helping your social media content strategy. UGC can be used to advocate for a business, and you can also feature content that relates to your brand’s values or the lifestyle of your target audience.

For example, ESPN is known for its coverage of college and professional sports, but you don’t have to be an athlete to get reposted on their TikTok page. They highlight a range of user-generated content from intramural sports to wholesome moments like in the video below:

@espn

This wholesome brother moment ❤️ (via jalenandcompany/IG) #basketball #brothers #hoops

♬ slipping through my fingers – Jen

11. Don’t be afraid to recycle content strategically

Instead of constantly coming up with fresh, relevant ideas for every post, think about how you can repurpose your best content. Repurposing your top-performing content saves you time and energy. If you reuse the content you know works, it could perform well on another network too. Reshare a Reel on your story, create a carousel or edit YouTube videos into digestible snippets for TikTok.

12. Use social listening to stay up-to-date on emerging trends

Social media managers are familiar with trying to get inside the head of their audience.

With social listening, you can become a fly on the wall and gain insights into your content. Social listening allows you to uncover conversations about your brand, keep a pulse on industry trends and learn more about your audience in general.

13. Use saved or canned replies

Using saved or canned replies is a common tactic for escalation management. Think of these responses like an FAQ page. FAQ pages help facilitate customer care because they provide immediate solutions to common questions or problems—a templated response does the same.

Plus, conversational commerce is growing, so automated responses used in messaging apps and other tools can attempt to help customers before escalating to an agent in real time.

14. Set up social media automation to save even more time

As mentioned above, automated responses can help streamline customer care conversations.

Setting up other social media automation features like scheduling and chatbots saves you time, which is one of the biggest keys to productivity and organization.

Sprout's Bot Builder Twitter bot for customer care

Instead of posting or responding to every message manually in real time, you can rely on automation to lift some of the weight for you.

15. Automate social media analytics and reports

You can also reclaim more of your time by automating your social media analytics. Instead of starting from scratch every time you want to pull a report, set a reporting schedule to auto-populate your metrics of choice at a certain time period.

There are a variety of social media reports you can automate to make managing social media for your brand easier.

Sprout's Cross Network Post Performance Report

16. Monitor, adapt, track, repeat

Get comfortable with frequently monitoring your social platforms, tracking performance, making adjustments as needed and repeating the cycle. Social media is ever-changing, so your content and strategy will evolve throughout the year too.

17. Learn to say no and delegate tasks

Social media managers are familiar with burnout. They juggle a lot of responsibilities while facing nuanced brand concerns, including complex issues that might impact their mental health. Talk to your manager about burnout if you need to communicate your concerns. Practice communicating your priorities when you’re feeling overwhelmed or need to rely on your team for support.

Don’t be afraid to say “no” or ask for help. Think of delegating your workload as a part of managing your mental health.

Grow your social media management strategy

We’ve covered 17 social media management tips to help you achieve organization and maintain productivity. If you’re looking for even more tips, see our guide on how to build your social media marketing strategy.

The post 17 social media management tips for productivity and organization appeared first on Sprout Social.


from Sprout Social https://ift.tt/51dBT7E
via IFTTT

Tuesday 30 August 2022

10 Facebook Analytics Tools to Measure Your Marketing Success

Having access to the right Facebook analytics tools is key to marketing success. If you’re not monitoring your performance, you’re marketing blindly.

With a Facebook analytics tool, you’re able to look into your audience’s demographics, your posts’ performance, your ads’ performance, your engagement rate and more. However, it can be difficult to find the best Facebook analytics tool for your team. Especially since Facebook shut down its standalone analytics tool in 2021.

Throughout this article, we’re going to cover the top 10 Facebook analytics tools you can use to measure your success. Including paid tools, free tools and a couple of tools that are ideal for monitoring your Facebook ads.

1. Sprout Social

If you haven’t yet heard of us, welcome! Sprout Social is an all-in-one social media management tool that helps brands create, schedule, manage and monitor their social media content.

While you can use Sprout with nearly any social media platform, we’re talking about Facebook today—and Sprout’s Facebook analytics tools are extremely useful.

Facebook Analytics Sprout

Sprout Social’s Facebook analytics options allow users to get a great overview of their Facebook Business Pages. You can quickly see your total impressions, number of engagements, clicks, audience growth and more. Plus, you can access audience demographics to make sure you’re targeting the right people.

Features:

  • Colorful, easy-to-read graphs that give you an instant idea of how your Facebook is doing
  • Competitor reports that let you get a glimpse at how your Facebook compares to the competition
  • The ability to tag content that belongs to certain campaigns so you can gauge campaign success
Facebook competitors

2. SocialPilot

A screenshot of the Socialpilot website

SocialPilot is a social media marketing tool that provides capabilities like publishing, scheduling, content curation, collaboration, Facebook ads management, and of course, Facebook analytics. To test-drive the tool, SocialPilot offers a 14-day free trial to give brands the opportunity to test out their features before biting the bullet.

Features:

  • Get insights into your best-performing Facebook content so you can create more of it
  • Discover the optimal times to post based on your specific audience insights
  • Gather detailed PDF reports of your Facebook analytics to share with your team or your clients

3. Keyhole

A screenshot of the Keyhole website

Keyhole is a social media management tool that focuses exclusively on analytics. They offer analytics for a number of platforms, including Facebook, with the goal of helping brands analyze all aspects of their online presence. From competitor analyses and campaign tracking to hashtag analytics and influencer tracking, Keyhole has a number of great options for brands looking to get a full scope of their Facebook activity.

Features:

  • Automated Facebook reports that make tracking performance as easy as possible
  • Hashtag tracking to provide insight into how your hashtag campaigns are performing
  • Profile analytics and account tracking that lets you gauge your success versus your competitors’

4. Rival IQ

A screenshot of the RivalIQ website

RivalIQ is another analytics-focused social media tool. Their tool allows companies to monitor several different platforms, like Facebook, Twitter, Instagram, YouTube, LinkedIn and TikTok. Monitor the success of your social media campaigns from one simple dashboard. The best part is that RivalIQ offers a number of free tools for brands who want to monitor their social media analytics on a budget.

Features:

  • Free head-to-head reports that show you how you compare to your biggest competitor on any given platform
  • Comprehensive social media audits that help you identify your best and worst-performing content
  • Machine learning that helps you understand why competitors may have received a jump in reach

5. Brand24

A screenshot of the Brand24 website

Brand24 is a social media monitoring tool that helps brands track their Facebook analytics. Monitor online company mentions, hashtags, trends, alerts and more through your Brand24 dashboard.

Features:

  • Discussion volume chart that allows you to analyze when your brand name is being talked about more often
  • Mention analytics that gives you insight into which accounts are talking about your business
  • Sentiment analysis to help you gauge the overall sentiments surrounding your brand name

6. Oktopost

A screenshot of the Oktopost website

Oktopost is a B2B social media engagement tool with a number of useful social media management capabilities. Oktopost is unique because it specifically caters to the B2B industry.

Features:

  • Customizable dashboards with a number of chart types to help visualize your results for your team
  • Insights into your buyers’ journey on Facebook and other social media platforms
  • Audience insights like follower growth, demographics, brand mentions and more

7. Facebook Insights

A screenshot of Facebook insights

While Facebook’s standalone analytics went away, they do still have a completely free Facebook Insights section of your Facebook Business Page. This helps you get a very high-level overview of how your Facebook posts are doing as a whole. To access your Facebook Insights, head over to your business page, then scroll down in the left sidebar until you see Insights.

Features:

  • At-a-glance page summary that gives you insight into how your Page has done the last week or month
  • Page follower insights to ensure you’re targeting the right audience and to know when to post
  • 13+ categories of insights to help you get a better idea of how your Facebook Page is doing

8. Meta Business Suite

A screenshot of Meta Business Suite

The insights section of the new Meta Business Suite is the biggest free analytics feature offered by Facebook. They’ve created this as a way to monitor the insights on your Facebook and Instagram profiles all in the same place. You can access the full suite of Meta business tools by going to business.facebook.com. Then, click Insights in the left sidebar to access your Facebook analytics.

Features:

  • The ability to gather Facebook and Instagram analytics in the same easy-to-access dashboard
  • In-depth insights into your content, audience, page results and more
  • Downloadable reports that you can easily share with your team or clients

9. Facebook Ads Manager

A screenshot of Facebook ads manager

If you’re running Facebook ads and looking for a way to keep track of them, your very first option is going to be none other than Facebook Ads Manager. Here, you’re able to get in-depth insights into the performance of your ads and if you need to make any adjustments for them to be successful. Plus, it’s a completely free tool (aside from the ad spend).

Features:

  • Performance charts that let you know how your ad is doing and how many people it’s reaching
  • Get insights on how relevant your audience thinks your ad is so you can make necessary changes
  • Take a look at insights at the campaign, ad set and ad level to see the nitty-gritty of your ad performance

10. AdEspresso

A screenshot of the AdEspresso website

AdEspresso is a social media tool dedicated specifically to helping you improve the efficacy of your social media ads. With tools that help with Facebook, Instagram and Google ads, you can easily get great insights into how to create and promote the best possible ads for your brand.

Features:

  • Get quick analyses on how your ad campaigns are performing with bird’s-eye-view reports
  • Automated PDF reporting that makes it quick and easy to grab reports for your ad performance
  • Tagging capabilities that allow you to monitor multiple campaigns at a time

Find the right Facebook analytics tool for your brand

It can be difficult to decide which tool is the best Facebook analytics tool for your brand. That’s why it’s always a good idea to take some time to look over each tool and its features, so you can make the most informed decision possible. If you’re still stuck, start a free trial with Sprout’s analytics tool or consider scheduling a demo to learn more.

The post 10 Facebook Analytics Tools to Measure Your Marketing Success appeared first on Sprout Social.


from Sprout Social https://ift.tt/qgxCwkz
via IFTTT

10 steps to create and sell online courses you’ll be proud of

How to create and sell online courses

Online courses are hot - and they have been for years now. According to Thinkific’s 2022 Online Learning Trends study, “Online content creation is the most popular type of business that people aspire to launch (51%), beating out selling products online (49%), providing services online (49%) or in person (46%), and opening a brick and mortar store (39%).”

This isn’t all just hype, either. Creating and selling an online course isn’t all that hard to do. There are online course platforms available now that make delivering a course super-easy, and once you know a few tricks, even creating the course content doesn’t have to be a big deal.

You don’t even need a huge online audience to make it work, either (though having an audience definitely helps!). Back in 2019, about a third of online students were attending courses created by people with less than 10,000 social media followers. In 2021, that percentage was up to 62%. So most of the students taking online courses now are taking those courses from people with relatively small audiences. So don’t let having a small audience hold you back.

You may not need a huge audience to have a successful course, but you do need to get a few things right while you’re planning, creating, and selling your course. To help you out, we’ve got a step-by-step plan for how to finally create and sell your own online course (whether it’s free or paid) and how to do it without spending a lot of money or taking a lot of time. 

All in, you can probably create a very simple course in a weekend. A more detailed course could take a month or more to create. But either way, having an online course could definitely be worth your time.

The benefits of creating an online course

Having an online course can be a life-changing — or at least a business-changing — thing. There are several reasons why:

  • Online courses save you time. Whether your course is free or paid, once it exists, you’ve got a way to demonstrate your expertise on autopilot. People can be taking your course while you do other things, like creating your newsletter, or playing with your kids. And if your course is paid, that also means you can be earning money from your course while you’re doing other things. And as we’re sure you’ve heard, passive income is a pretty awesome thing.
  • Online courses open doors. Even a simple autoresponder-based course can be a terrific way to promote your work. Free courses can be used to promote paid courses, too. Courses can often serve as marketing tools on their own, especially if you publish your course on one of the large course platforms.
  • Online courses demonstrate your expertise. Courses can also be a great way to educate people about how to work with you, or to give people a sense of what it would be like to work with you. For instance, a graphic designer could create a course about visual branding, or how to design a logo. This would be an ideal way to demonstrate the value of the designer’s work and let the designer help people (and earn money from people) who can’t afford to hire her.
  • Courses can be ideal complements to other types of content. Many authors create courses that complement their books, for example. This gives people a way to apply what they’ve learned in the book, or to study the topic in more depth. It also gives the author a way to build their email list and make more money from their experience. Once they’ve written a book, making a section of that book into a course isn’t terribly hard. 

Those are just a few reasons people are creating courses now. You may discover a few more once your course is launched.

So let’s make that course happen. Here are ten steps to creating and selling an online course that will give you the benefits you want. 

1. Choose your topic

There are a lot of courses available. For example: Want to play the harmonica? There are 55 courses to show you how, just on Udemy. Another big online course platform, Domestika, has 48 courses just on lettering. Or a quick online search could help you find a way to master indoor shrimp farming or get outdoors for some African animal tracking.

So don’t be shy about picking an unusual topic. Weird is okay, so long as there’s enough of an audience to make your course worth creating.

If you’re not sure what you could create a course about, here’s an easy exercise to find out.

On a plain sheet of paper, make three columns:

[wptb id=102515]


Fill out the columns for at least five different topics. Why five? It’s good to have a few ideas to work with so you can stay open to the course topic most likely to succeed.

Now, ask yourself: What’s the need? Would someone take a course about this topic out of curiosity, or because they have a problem to solve, or some other reason?

Maybe you could create a course about how to create fantastic holiday cookie gift tins — and people would buy that because it’s a fun topic. Completing your course is something they’d really enjoy.

Or maybe your topic is more problem-centered. Maybe you’re thinking about a problem like how to keep a house clean in just two hours a week, or how to recover from knee surgery, or how to talk to a teenager. 

What problems exist around these topics that people want to solve, but they haven’t been able to solve up until now because they think it will be too hard, too expensive, too likely to fail?

When you’ve got a few topics and the why behind why someone would take a course about this topic, then you’re ready for the next step. (Don’t skip the why! It’s super-important.)

2. Choose your audience

Who is your course for? Again, don’t skip over this — the more specific you are about who your course is for, the more likely you are to be successful.

For example, take the topic of “how to talk to your teenager.” Could that be for parents in general, or for single parents, or for single dads, or for single dads who just got a divorce?

People respond to courses that are laser-targeted to their needs. The most common question a prospective buyer (or even a free course taker) will have about your course is this: “Is it right for me?” Even if you’ve got a lot of raving testimonials and great course content, everyone who considers your course will still be asking themselves, “is this course right for me?”

The better you target your audience, the more likely it is that people will feel confident in taking it.

Pro tip: Go find a few popular courses on a public platform like Udemy. Then think about how you could do a course about that same topic, but for a specific target market. Your target market can be a demographic (urban men 28-35), or for people who share a common attribute, like “How to grow great houseplants - even if you tend to kill them.”

3. Confirm there’s a market and interest in your course

OK — you’ve got a great course topic, and you know exactly who your course is for. Now, let’s make sure there’s enough interest in your course to make it worth creating. Nothing stings more than creating a full, fabulous course… only to find out no one wants it. And sadly, while this is a common piece of advice, many course creators still ignore it.

So go find at least a few people who say they’d be interested in your course.

Here are the three best ways to do this: 

  • Search for competitors.
    Go to Udemy or any other major course platform and just do a search for what your course could be about. For example, here’s a sample search on udemy for “choose a freelance writing niche.”
sample search on udemy for “choose a freelance writing niche.”
  • Google works just fine for this, too. Just Google “[your topic] course” and see what turns up. Also try a few searches on YouTube and Instagram.

    If you find a few courses, try to see how many students they have. Sometimes this is easy; other times not so much.
  • Ask.
    Even if your audience is small, ask them if they’d be interested in your course. Or borrow someone else’s audience - many Facebook group admins will let you post a question like this in their group, especially if you contribute to the discussions a lot.

    If you’ve got a little bit of budget, you can also run ads to your target audience to see if they’d like your course. You might have to do a “dry test” - aka “pre-sell your course” to really know how interested people are. Or you can offer a lead magnet that’s basically a slimmed down version of your course. If the lead magnet does really well, people are at least interested in the topic.
  • Find high-interest topics that don’t already have courses.
    This is a little riskier, but just because no one’s made a course on a certain topic doesn’t mean you can’t be the first. Just be cautious — if no one has created a course on your topic, there may be a reason.
    The best places to find hot topics are via Amazon book searches, YouTube top searches, and (sometimes) hashtags on social media platforms like TikTok and Instagram. Facebook groups can be another rich source of information.

4. Find out what people want to know

This is yet another critical part of creating successful online courses that a lot of people miss. They’ll go through the entire process of creating a course, write up their sales page, pay good money to send people to that sales page, and… no one will buy.

Lack of sales can be caused by a lot of things, of course, but really it comes down to this: You’re offering something people don’t really want. And so while picking the right topic and the right audience are key to this, so is including what people want in a course.

This is a little more work than just leaping into content creation, but boy, is it worth the time. And it will take some time. Here are the three best ways to get this done:

  • Talk to potential students.
    Ideally, you’ll have an email list of people (even a couple hundred people is enough) and you’ll have sent out an email asking if anyone is interested in this course idea you’ve got.
    Say ten people respond that they are interested. You get back to these potential students and try to get them on a Zoom call or a phone call to talk to them about what they’d like you to include in the course. If you can, record those conversations. If not, take the best notes you can. If you have to pay them, do it.
    Getting people to talk to you directly is the best way to find out what your course should include. You’ll learn an enormous amount about your audience in just a few calls. 
  • Do a survey.
    Again, you can do this with an email list. Or you can try to get people on social media to respond to a few quick polls. 
  • Go to online groups (Facebook groups are the easiest to find).
    See what people are talking about. See which posts get the most engagement. See what people are asking about. 

5. Define the transformation

Sounds dramatic, right? “Define the transformation” means find a way to concisely explain how people will be different after they take your course.

This is a critical but oh-so-often overlooked part of creating and selling online courses. You see, people don’t really care how much content you’ve crammed into your course. They don’t care if you’ve got 90 hours of video and 23 workbooks and 45,000 words of text-based lessons. All that might actually make them less likely to buy your course.

Most people just want to get from point A (where they are now) to point B (where they want to be). The more efficiently your course gets them from A to B, the more they’ll want to take it.

So work on how to explain this in a way that’s crystal clear. Do this before you start creating content.

As you’re “defining the transformation,” really what you’re doing is building a path for people through your course’s content. You’re giving them (and you) a goal. You’re also saving yourself so much work.

There’s another benefit to thinking of your course simply as taking people from A to B: It helps you write your sales page and all your marketing materials. But more on that in a moment. 

6. Block out the sections and lessons of your course

Now it’s time to block out your course’s lessons. But before you start creating content, do yourself a favor: Establish a structure.

Block out three to five major sections of your course, with each section having three to seven lessons. That’s enough material for your course to feel meaty, but still concise enough so people don’t get overwhelmed. And people can definitely get overwhelmed with course content. If you tend to “overdeliver,” be aware of this — do yourself and your students a favor and keep your content brief.

Once you’ve got your course’s sections and lessons blocked out, it’s time to figure out what each lesson will cover. Aim for three to seven key points for each lesson.

Brevity is your friend here, too: People will zone out if a lesson is too long. Try to have your video lessons be 10 minutes or less (15 minutes, absolute maximum), and your text based lessons no more than 1,500 words. Your students should be able to finish each lesson in your course within about 15 minutes or less.

With 15 minutes per lesson, four lessons in each section, and four sections, you’ll end up with about 4 hours worth of content (15 minutes x 4 lessons for each section = 1 hour for each section). That’s plenty of time to deliver a lot of value, but a short enough period of time to make your course feel manageable.

Pro tip: Remember how you defined a transformation that people will go through as a result of taking your course? Apply that principle to each section of your course and each lesson of your course. You might even open each section of your course by saying, “by the end of this section, you’ll be able to [that section’s goal].” You could also open each lesson with, “By the end of this lesson, you’ll be able to [that lesson’s goal].

The whole “point A to point B” structure will help you create a course that’s more concise and valuable, but it also will help your students feel like they’re making progress. That’s a powerful way to keep them motivated so they complete your course, get results, and have a positive experience (so they’ll leave you a great testimonial, and so you’ll sell more courses).

7. Get it out on paper, or video, or audio — or all three

You’ve got that outline… now it’s time to fill in the blanks.

Many courses are video-based, but also have a text and audio version of each lesson. Depending on your course topic and how comfortable you are on camera, you can either do “talking head” videos, or you can create PowerPoint-like slides and just record your voice explaining the slides, or have a little inset of yourself so that people can still see you.

If you’ve got a bit of budget for your course, consider getting your videos edited. This will improve your students’ experience of your course. Also consider using an audio to text transcription service like Otter.ai to make text drafts of your video lessons. And if you’re really short on time, take those text transcripts of your videos and hire a freelance writer to clean up the copy so it reads well.

8. Decide whether your course will be free or paid

Free courses are good if you want to get a lot of people into them. Or you can use a simple free course to promote a paid course.

If you are doing a paid course, you’ll also need to decide how much it will cost. And if it’s more than $400 or so, you’ll also need to decide if you’re going to offer a payment plan. Payment plans tend to split the cost of a course into thirds, and they usually add about 15% of the value of the course for the payment plan. So if your course costs $397, a payment plan would break into three monthly payments of $147 each.

If you publish your course on one of the large public course platforms (like Udemy), you’re basically offering a hybrid of the free versus paid course. There will be a charge for your course, but it’ll be so cheap - $9.99 - that the risk for the student is very low. 

Courses on platforms like this can make money, but you’ll need hundreds or thousands of sales to generate any meaningful income. That said, a low-priced course on a big platform can be an excellent promotional tool for your work or for a more expensive course you offer elsewhere.

Another play is to price your course super-low or for free when you first launch it. This gets at least a few students into your course, so you can get lots of feedback from them and hopefully a few really strong testimonials. Then you re-launch your improved course, with testimonials, at a higher price. All this takes longer, but it will probably get you better results in the end.

Note that paid courses also typically have some kind of refund terms, and those terms are going to be very important if your course costs more than even $27. Refund terms can also vary a lot, but they tend to fall into three types of refunds:

  • No refund.
    This is the least attractive option for potential students, but there’s no way people will misunderstand the terms. You may need to give prospective students a free lesson or two, just so they can see for themselves that your course is worth the money.
  • A 7-day refund.
    This is a good compromise for both students and teacher, because the students get access to the course and the teacher has very clear terms for the refund. The drawback is some teachers may be concerned that people will just zoom through the course, download all the materials, and then ask for a refund.
  • The “do the work, get the results” refund.
    For this option, students have to complete the course before they can ask for a refund. The idea here is that when a student buys the course, they’re entering into a contract with themselves and the teacher — buying the course is a commitment to do the work. Students are eligible for the refund only after completing the course and only if they can honestly say it didn’t work for them. The sales pitch is that this is being offered because the teacher is 100% sure that if a student just shows up and does the work in the course, they will absolutely be successful and get their money’s worth. You’ll need to spell out the terms of this very clearly or some students may complain.

Once you’ve decided whether your course will be free or paid, and if paid, the terms of the sale, then you’ll be halfway towards figuring out how you’ll deliver (aka “fulfill”) your course. 

9. Set up how you’ll deliver your course

There are four ways to deliver your course. You can:

  • Use a course builder platform like Thinkific or Kajabi
  • Host the course on your website with a WordPress plugin (or with Wix or SquareSpace integrations)
  • Publish on a course marketplace platform like Udemy 
  • Set up your course as an email autoresponder (aka an “email sequence”)

Here are the pros and cons and costs of each of these options:

[wptb id=102510]

10. Give people a way to sign up for your course

This can be as simple as creating a sign-up form for an email sequence, or it might mean configuring a shopping cart in an LMS learning system on your WordPress site.

You’ll also need to decide if you want to use Stripe or PayPal so people can actually give you money. Or if you want to offer both.

That sounds like a lot, but it doesn’t have to be a big deal. Any online course platform like Thinkific or Teachable will have a payment system pretty much set up — you’ll just need to add a few things to configure the check out, and you’ll be done. And if you’re selling on Udemy or one of the other public course platforms, the entire set up is done for you. You’ll just need to add which PayPal account or Stripe account to send your money to.

Setting up a sales page for an autoresponder-based course is fairly easy, too. This video walks through exactly how to do it, step by step, in about five minutes. If you wanted to write out a full sales page, clearly that’ll take a little bit longer, but the basic setup to give people a way to buy your course is really pretty easy.

Ready to get started?

So now you know how to create and sell online courses. There are a few steps to it, but you really could create a simple course over a weekend — especially if you’ve already got some content created in other formats, like in a book or blog posts, or even in short videos.

Usually the big thing blocking people from completing their course is they overcomplicate it. They overdeliver.

So keep it simple. Create a good, simple course and see how well it works for you and your students. If you’re getting good results from it, then go back and expand the course. Improve on what’s working.

The post 10 steps to create and sell online courses you’ll be proud of appeared first on AWeber.


from AWeber https://ift.tt/Y5vBWol
via IFTTT

Is a Discord community right for your brand?

Discord is the future of online communities.

Traditionally associated with gamers, the platform has gone mainstream.

Today the seven year-old company has grown to more than 300 million registered users.

This adoption of Discord is part of a much broader trend. Gen Z, in particular, is opting to spend time in smaller, private online communities.

According to the Harvard Business Review, “…even before Covid-19, Gen Z was eschewing traditional social media for ‘digital campfires,’ more intimate online destinations where they private message or connect either in micro-communities or larger shared experiences.”

Marketers, creators and community builders looking to future proof themselves should take a moment to reflect—are you part of that “digital campfire?”

The answer is likely…no.

So, how do you get started and what role should Discord serve in your audience engagement strategy?

What is Discord and what role does it play?

Discord is not a traditional social media platform. It’s not a place for organic growth and awareness. Instead, it is a community platform.

A Discord server is a hub. Its driving purpose is to deepen relationships with existing, hard core fans and evangelists.

This distinction is critical.

Brands on Discord should focus on two things. First, providing experiences that are unique and cannot be replicated elsewhere. Second, should be facilitating connections and conversations amongst community members.

It’s this deeper sense of community that has brands such StockX, Skittles and Chipotle flocking to the platform. The CMO of StockX, Deena Bahri, explained in Adweek, “The customer is looking for more—more engagement, more dialogue, more input—and Discord is one of the platforms offering that.”

The most active Discord servers have chats occurring across multiple channels 24/7. The pace at which conversations occur within Discord tend to be much quicker than other platforms.

Users participate in chats, have video and/or audio calls, screen share and send direct messages to one another. Topics within a Discord server are organized around “channels,” which ensures conversations are focused and easy to navigate.

All this to say, setting up a Discord community may require more attention and investment to reach fewer people. However, there’s a tradeoff. Those people and that community (when cultivated carefully) will build a deeper relationship with your company. Discord allows for a two-way conversation between the brand and its community, making them feel like they are part of the organization—not just end customers.

How do you set up a Discord server?

To start a new Discord server, click the plus sign below the server icons on the left side of the screen.

Screenshot of Discord's homepage with an arrow showing where to click to create a new server

From there you can create a server from scratch or choose a template.

Screenshot of the options Discord shows to create a new server

The templates give you a list of channels to start with that you can edit if you want.

Once you’ve selected your template (or lack thereof) you’ll be prompted to select your server name and upload an icon.

Screenshot of options to customize a new Discord server name

Congrats. Now you have a Discord server.

After you’ve created your server, you’ll need to create channels.

There are two types of channels: text and voice. Text is for all written and image-based conversation, while voice can be voice and/or video.

Regardless of the type of channels you create, you’ll want them to be focused around your community’s interests. This is where community members will congregate to interact with you (and one another) around the selected topics.

Screenshot of a new Discord server with arrows pointing to the text and audio channel options
Screenshot of a Discord prompt to create a new audio or text channel

To ensure you cultivate a welcoming community you may want to create a rules page for new members. You can also create and assign roles for your community members. Roles determine a member’s admin permissions and as the community expands you could assign moderator status to users you trust.

Regardless, these are details you can finesse and refine over time.

How do you nurture a Discord community?

Great communities start as small communities.

It’s counterintuitive but true. With Discord, in particular, it’s about depth vs breadth. Especially, when you’re starting out. Here are three tips to consider as you build and engage your audience on the platform:

1. Identify your inaugural class

You may want to hand select the initial members you want to have join the community. Or, at least limit the initial number of members. This will allow you to refine your community management process and work out any kinks.

So who should join initially?

Are there avid fans of your brand? Who is regularly commenting on your social posts or creating content promoting your brand?

These brand evangelists make ideal members. They’re going to be excited about the opportunity.

2. Plan your content (and conversation starters)

Now that you’ve got your initial community, it’s time to activate them.

Ask yourself, what access and/or exclusives can you provide?

Inspire community activity by prompting (and sustaining) conversations within your server.

Develop a content calendar to ensure a steady drumbeat of activity and discussions. Ideally, surprise and delight your community so they feel like they’re spending their time wisely and have a reason to keep coming back.

Maybe your CEO or founder is admired by the community. Perhaps your brand has a big celebrity or influencer ambassador. Any of these would make exciting AMAs.

Exclusive first looks at products would also make a great incentive, and provide an opportunity to get valuable consumer feedback before a big launch.

You’ll want to focus on activities designed to spark high levels of engagement. Create momentum via a steady drumbeat of activity. Remember, it takes time for visiting a community to become a habit.

3. Test and learn, then loosen the reigns

During the early stages of cultivating a community, most activities will need to be prompted by you. Invest in fostering relationships with these early members. Get feedback and identify what keeps them engaged. Apply their input and test what works.

Ultimately, this is all being done to ensure the community is a worthwhile experience when you scale.

Once the community finally reaches a tipping point where the majority of conversation is not being prompted by you, that’s a sign to start adding more members and scale.

If your brand has accomplished this, you’ll have developed a truly meaningful Discord community.

Is it worth it? Should your brand invest in developing a Discord community?

Ultimately, it depends on your goals as a brand. An apt analogy would be comparing Discord to a house party. It’s a private and intimate affair. Whereas Facebook, Instagram, or Twitter is like a Vegas nightclub – a place to see and be seen.

Sure, they’re both parties, but they’re drastically different experiences.

If you’re looking for a platform that will help you quickly grow your audience, Discord isn’t it. But if you have the resources to invest in building a long-term community of people who can amplify and advocate for your brand, Discord is absolutely the place to be.

“Audience” and “community” are no longer interchangeable in the world of social. Read more to find out why.

The post Is a Discord community right for your brand? appeared first on Sprout Social.


from Sprout Social https://ift.tt/VAI0fvU
via IFTTT

Lessons learned as an entry-level software engineer

If you asked me a year ago what a software engineer did, I would have said something along the lines of “solving problems through code.” It’s a simple answer that points to how the work we produce is evaluated. For engineers on product-driven teams, these problems could include how to implement a new feature that customers have been asking for, or how to improve the performance of existing features.

If you ask me the same question today, I would give a slightly different response. Software engineers are tasked with solving the right problems through code—and when solved effectively, they accomplish business goals. Figuring out which problems to solve and how to solve them is the most important part of being a developer, with the actual implementation details being secondary.

My path to software engineering

I became interested in programming after taking a class at Upperline Code the summer before my freshman year of college. I got this opportunity through a college and career readiness program that I was part of called The Opportunity Network.

Upperline Code was my first introduction to programming, and where I quickly realized I was interested in learning to code. Later that summer, I received my Notre Dame enrollment packet and switched from the College of Arts and Letters to the College of Engineering so I could major in Computer Science (CS).

Some of my favorite CS courses were Design/Analysis of Algorithms, Cloud Computing and Programming Challenges. The problems were interesting and the professors were great at presenting new ideas and explaining concepts.

Throughout undergrad, I knew that I wanted to work as a software engineer and use the technical skills that I gained. Thankfully, the summer before my senior year, I had the opportunity to intern as a software engineer at Kantata and pair-program with other engineers to help deliver features.

My internship experience, along with pep talks from my professors, gave me the confidence to not settle for any other role when I first started applying for jobs. After plenty of time spent in office hours, I graduated in 2021 with a CS degree and accepted an offer to be an Associate Software Engineer here at Sprout Social.

Julius Boateng and a group of colleagues from Sprout Social

Settling into Sprout Social

Part of being new to the role and new to the company was having to develop both general software engineering skills and Sprout-specific domain knowledge. I found that tasks which required general programming knowledge to understand were the easiest for me to solve. However, tasks that required knowledge of Sprout’s architecture took time for me to tackle and I had to rely on my team for help. While there are some problems you can solve by reading documentation online, you can’t always find information that is relevant to the work that you’re doing—being able to ask others for guidance is crucial.

One of the first things that stood out to me when I joined Sprout was how collaborative the development process is. I knew that it took entire teams to develop features, but I didn’t know what that looked like in practice. I quickly realized that releasing a successful feature required many people in different roles working together—from product managers defining project requirements, to designers creating mockups and engineers implementing features. Collaboration wasn’t something that was optional, but a necessity in accomplishing our team’s goals.

Photo of Julius Boating and Sprout coworkers outside of Calder's Flamingo statue in downtown Chicago

Learning how to navigate through the various codebases and building a mental model of how different services interacted with each other was a steep learning curve. Since Sprout’s core business is software, its architecture is heavily shaped by its business requirements. As I was ramping up,  I had to be aware of the business problems developers were trying to solve and why previous architectural decisions were made.

Initially, I was a bit intimidated that pull requests required reviews before they could be merged into the codebase. Understanding that the main purpose of code reviews is knowledge sharing and maintaining code standards helped change my perspective.

Going through code reviews has helped sharpen my technical skills and improve the quality of my pull requests. Having peers give me advice on what to change, introduce me to new patterns, and point me to relevant areas of the codebase has been really helpful. Reading the pull requests of other engineers has also given me valuable visibility into other services that I am not directly working on.

Your previous experiences matter

There is a prevailing idea that as you enter new stages in life, your previous experiences no longer matter. Once you enter college, your high school experiences no longer matter. Once you enter the workforce, your college experiences no longer matter.

But something that is often overlooked is that our experiences, knowledge, and habits have a compounding effect. We usually are only able to achieve new things thanks to the work we’ve done before. The knowledge and skills that I previously gained have greatly influenced how I approach new challenges as an entry-level software engineer.

The classes during undergrad that had the most direct impact on my day-to-day work at Sprout were Programming Challenges and Database Concepts. The former taught me how to break apart large problems into smaller pieces to solve them more efficiently. It helped me become more intentional on how I structured my code and improved the readability of my code.

Database Concepts taught me fundamental relational database concepts and covered topics such as database schema design and SQL. I learned how to write queries, which has been extremely useful since I frequently need to query our databases to solve problems or answer questions.

Animated gif of a TurtleBot robot kit.

The opportunities I had outside of the classroom were equally as valuable. Java wasn’t a language that was covered in most of my courses, however I had the opportunity to work on it for a business project that one of my professors was leading. I gained hands-on experience writing Java, working with MySQL databases and creating Docker images. Learning Java was especially helpful since most of Sprout’s services are written in it.

There are a lot of other skills that I gained over my time in undergrad that I take for granted, like navigating the command line and understanding core programming concepts. It’s a common misconception that since most of the topics covered in undergrad are theoretical in nature, they won’t prepare you for software engineering careers. However, I believe the opposite is true—the skills you learn in undergrad matter, even if they aren’t directly applicable to your day-to-day work.

Computer Science is an extremely broad field

CS covers a variety of specializations such as artificial intelligence, machine learning and data science. The experience you gain in undergrad serves as foundational knowledge that can serve you well in a variety of entry-level roles not exclusive to software engineering. Making the jump from undergrad to a full-time position provides an opportunity to explore what kind of role and specialty is the right fit for you.

If you’re looking to start a career in software engineering, Sprout’s a great place to begin.

The post Lessons learned as an entry-level software engineer appeared first on Sprout Social.


from Sprout Social https://ift.tt/tuwJYMk
via IFTTT

Monday 29 August 2022

What is a social media content creator and when should you hire one?

We are officially in the era of the social media content creator.

What was once a hobby is now a bonafide career path. Brands of all sizes and industries want in on the creator economy, creating new functions within social media teams.

Hiring for a role you’ve never filled before can be tricky, especially when it’s a role that’s still emerging within its discipline. If you want to level up your social strategy with a social media content creator, here’s everything you need to know.

What’s a social media content creator?

A social media content creator is an individual who creates and shares content intended to educate or entertain an audience across social media platforms.

The internet offers several avenues for content creation. You can write blogs, share newsletters, draft web copy—the list goes on. This subset of content creators is solely focused on understanding and building their audience on social media.

On the surface, that may seem limiting. In reality, it’s anything but. Social media trends and functionality change daily. Their focus on the channel gives them an unparalleled understanding of what works on their preferred networks.

Content creator vs social media manager: what’s the difference?

While there certainly is overlap between social media content creators and social media managers, they’re not one and the same.

Content creation is one of many responsibilities a social media manager might take on. Social media management also includes:

  • Community management
  • Online reputation management
  • Analytics and reporting
  • Strategic planning
  • Team management

These efforts make the most out of the channel as a business function. They also take a lot of time. Adding video and graphic production to the list can quickly create an unsustainable workload.

That’s why social media managers and social media content creators are a match made in heaven. Creators allow managers to offload content production, allowing them to focus on more strategic initiatives.

The apps social media content creators use the most

It’s pretty common for social media content creators to maintain a presence across most major social media networks.

Why? It’s good business.

Each network has its own engagement advantages. Maintaining a presence across a handful of networks ensures that a creator can continue to grow and connect with their audience as trends shift and evolve.

For example, Tyler Gaca (AKA @ghosthoney across all networks) rose to popularity on TikTok but now uses:

  • Instagram to post about upcoming appearances and collaborations
  • YouTube to share long-form video content
  • Twitter to share off-the-cuff thoughts and observations
  • Twitch to stream video game plays

This is great news for marketers who are revving up partnerships across several networks at once. Our research found that more than half anticipate using Instagram, Facebook and TikTok for creator collaborations within the next three to six months.

A chart showing the top platforms marketers plan to use for creator collaborations in the next three to six months. Instagram, Facebook and TikTok take the top three spots.

Think of it this way: If a marketer were to partner with a social media content creator that has a major following on TikTok, they’d only reach audiences that are currently using TikTok.

If they partner with a creator that has a following on TikTok, Instagram and Twitter, they can request that a sponsored post be shared across all networks. That’s way more reach with just a little bit of extra effort on behalf of both parties.

Social media content creator jobs

If you’re interested in hiring a social media content creator, there are a few different ways you can go. You could:

Each of these options has its own pros and cons depending on your needs. Regardless of which one you choose, one thing is certain: these individuals should focus solely on creating content.

That may not seem like enough responsibility to justify an entire role, but a lot of work can go into a single post. Greer Hiltabidle, a TikTok creator for 360i, broke down the role responsibilities in a recent interview with Marketing Brew: “You’re a director; you’re an actor; you’re a filmmaker; you’re a writer. You do wardrobe, set design.”

On top of all these production duties, social media content creators are also tasked with creative ideation. Adding too many additional responsibilities on top of that can easily overburden a creator.

How to craft a social media content creator job description

There’s nothing more intimidating than a blank page, especially when writing a job description.

Thankfully, there are a lot of places you can turn to for inspo. For starters, our pack of social media manager job description templates has a digital content creator role description that’s ready to personalize.

You can also look at existing job listings to kickstart your creativity. For example, you may want to mimic how this contract social media content creator role from Blizzard outlines the collaboration and creation expectations.

A social media content creator job description from Blizzard Games.

At the end of the day, as long as you’re clear on your purpose and realistic about your expectations, you’ll find the candidate you need.

Social media content creator salary estimates

Social media content creator salaries are a bit of a wild west. At the end of the day, it all comes down to your chosen compensation structure.

If you’re going with a freelance social media content creator, we’ve gathered some price-per-post baselines in our most recent data report on the creator economy.

A chart showing average creator compensation by post type.

These estimates can be influenced by several factors, including brand investment and creator-to-brand affinity. Depending on your industry, comped products or affiliate marketing opportunities could work as a supplement to smaller base pay.

Graphic of a brand-creator compensation matrix, detailing four options for how brands can pay for creators' time and effort

Those looking to hire an in-house content creator ditch the price-per-post payment method in favor of an annual salary. According to Glassdoor, the estimated total pay for a social media content creator in the U.S. is $69,419.

How brands can collaborate with social media content creators

There are tons of ways brands can partner with social media content creators to drive their business forward.

A chart outlining marketer's primary goals when working with creators.

Whether you want to generate more engagement or simply reduce the burden of always-on content creation, there’s a creator that can help you meet your social media goals.

The key is to work with creators who know what’s trending online. Memes and viral video formats can rise and fall in popularity in less than 24 hours. Partnering with someone who can quickly put their own spin on a social media moment is crucial to maintaining brand relevance.

The more you work with social media content creators, the easier it will be to develop a process that’s collaborative and on brand without sacrificing timeliness. As you prepare to take the plunge, here’s how you can lay a foundation for powerful, lasting relationships with creators.

Hire freelance social media content creators

You wouldn’t buy a car without taking it for a test drive first, right?

Think of working with freelance creators as that initial test drive. It allows you to better understand what you want out of a partnership, which networks yield the best results and what content formats work well with your audience.

If you’ve never worked with a creator before, try using freelancer apps like Fiverr or Upwork to parse through your options. If you find a creator that you establish a strong working relationship with, there’s always an opportunity to expand the contract or offer them a full-time position.

Look for the right fit (not the flashiest)

If there’s one certainty in social media, it’s that people can sniff out a fake partnership a mile away.

According to Kerrie Smith, a content strategist for Twitter ArtHouse, authenticity is everything.

“Consumers are on the lookout for partnerships that feel forced and many creators now have the luxury of turning down brand opportunities that don’t feel like the right fit for their business goals. People are no longer averse to #ad, but they will reject inauthentic advertising. Invest in tools to help you listen to your community on Twitter and uncover the creators that are talking about your brand already. Leverage insights to align with creators that are driving the trending moments that your brand can participate in.”

Prioritize diversity and inclusion

It’s no secret brands have struggled to diversify the talent they work with.

Not only is it bad PR, it’s also bad business sense. Inclusive campaigns bring unique perspectives to your content, broadening your reach beyond any single group of consumers.

For example: When Häagen-Dazs wanted to increase its brand awareness among non-white consumers, they partnered with award-winning actor Lena Waithe and marginalized social media content creators to develop branded content. Representation matters in marketing.

When brands fail to account for the diversity of their target audience, don’t be surprised to see members of marginalized communities take their business elsewhere.

Trust your creators

As Rachel Karten, social media consultant and author of the Link in Bio newsletter puts it: “It’s not hard to spot a brand that has an overbearing approval process.”

When working with creators, you need to be ready to abandon the multi-step approval process you’re used to. Nothing shorts originality like putting a post through a few dozen rounds of editing. Plus, it runs you the risk of missing a trend entirely.

To reap the full benefits of partnering with social media content creators, you need to give them the creative freedom and creator tools needed to do their thing. Remember: you’re paying for their perspective and unique voice. Stifling that can hurt both your brand and your relationship with a creator.

Ready to hire a social media content creator?

Trends and consumer preferences are changing faster than ever before. If you’re looking for new ways to maintain your brand’s relevance online, social media content creators may be the solution for you.

For everything else you need to know to evolve your social media strategy, check out the latest edition of the Sprout Social Index™. Inside, you’ll find data-backed insights on what people want from brands and what other marketers are doing to keep up.

The post What is a social media content creator and when should you hire one? appeared first on Sprout Social.


from Sprout Social https://ift.tt/4jEd3sp
via IFTTT