Email segmentation makes it easy to sort and filter subscribers into relevant groups and send them content they care about. In fact, it’s key if you’re aiming to improve your open and click through rates: Studies show that sending personalized content can result in 6x higher conversion rates.
Yet nearly 70% of brands aren’t even scratching the surface of targeting and personalization.
It could be that you don’t know how to segment your audience. Or maybe you’re not sure what type of content to send them once you’ve sorted them into groups.
If you’re new to email segmentation, we’ll break down the things you need to know to get started.
What is segmentation?
Segmentation is the process of separating your subscriber list into smaller, organized subgroups based on their interests, behaviors or characteristics. Essentially, email list segmentation is the act of taking a list and filtering and sorting your subscribers into relevant groups.
There’s a million different ways to segment your audience, and they can all help you better target your email sends, which can lead to higher open and click-through rates.
You can segment your list using any subscriber data available to you. But if you’re just getting started with segmentation, you probably want to break up your master list based on at least one of the following data points:
- Demographics (age, hometown, location, job, gender)
- Behaviors (purchase history, opens, click-throughs, website browsing)
- Interests (hobbies, causes, opinions)
- Entry point (sign up form, lead magnet, social media)
- Email preferences (message time and frequency; mobile or desktop)
- Skill level (beginner, intermediate, advanced)
- Marketing funnel location (new customer, repeat customer)
For example, if you’re a healthy food blogger, you can create segments based on dietary preference (i.e. vegetarian, vegan, dairy free, etc.). You can do this by asking subscribers to select an option when they sign-up to your list or linking out in your welcome email.
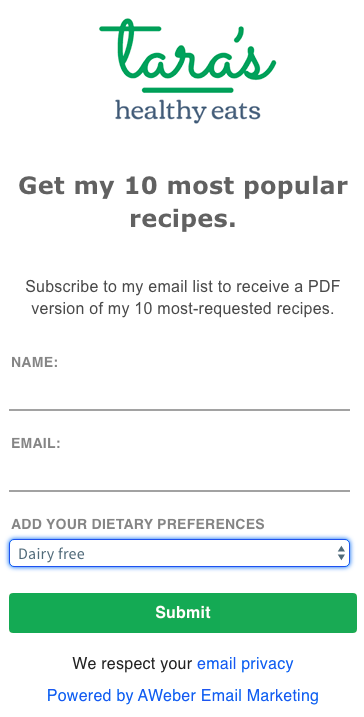
When a subscriber selects “dairy free” as their dietary preference, they will receive a tag indicating that characteristic.
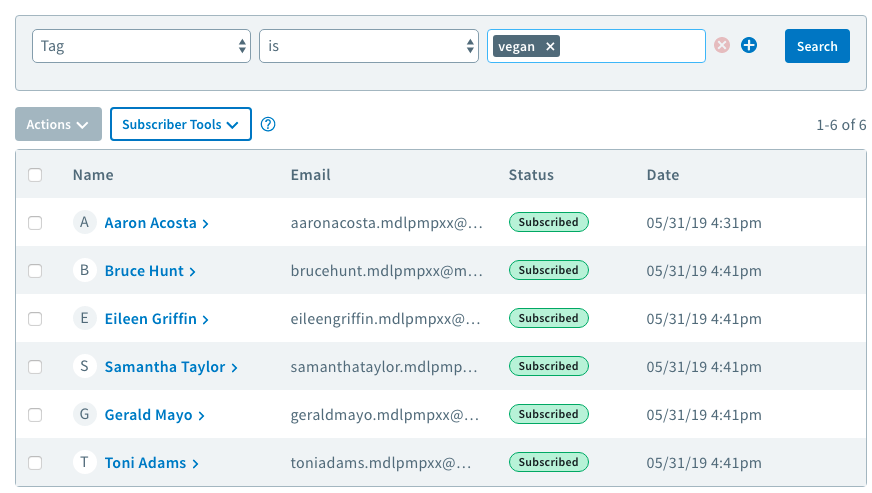
In AWeber and other reputable email service providers, email tags serve as a label, letting you organize and categorize your contacts. You can’t talk about segmentation without talking about tags.
In the example below, you can see how to search for and create a segment of “vegan” subscribers based on whether they have the tag “vegan.”
The benefits of email marketing segmentation
We already shared how segmentation can result in higher opens and clicks. But did you know it can also lead to increased engagement with your email campaigns?
Sending targeted content is the best way to get subscribers engaged with your brand. That’s because people are more likely to respond to messaging that is relevant to their needs and interests.
It can also help you build trust with your subscribers. They’re more likely to stick around if they feel you truly understand them.
Plus, proper targeting can help you drive 3x more revenue per email. Even though you may be sending to a smaller group of people than you would be without segmenting, you are able to focus your messaging on one group of people.
Email segmentation in 7 simple steps
If you’re brand new to email segmentation, don’t stress. Follow these 7 simple steps to learn how to get started. I’m willing to bet once you do it one time, you’ll feel much more comfortable segmenting and personalizing your emails.
Step #1: Capture the information you need to create segments
Capturing information about your subscribers on your sign up form is a great place to start with email segmentation. By asking them questions right away, you’re better able to address their needs from their first touchpoint.
Use a sign up form with a drop down menu, or create a landing page.
Even if you’re not asking subscribers to provide information about themselves up front, you can tell a lot about their interests based on what they signed up for.
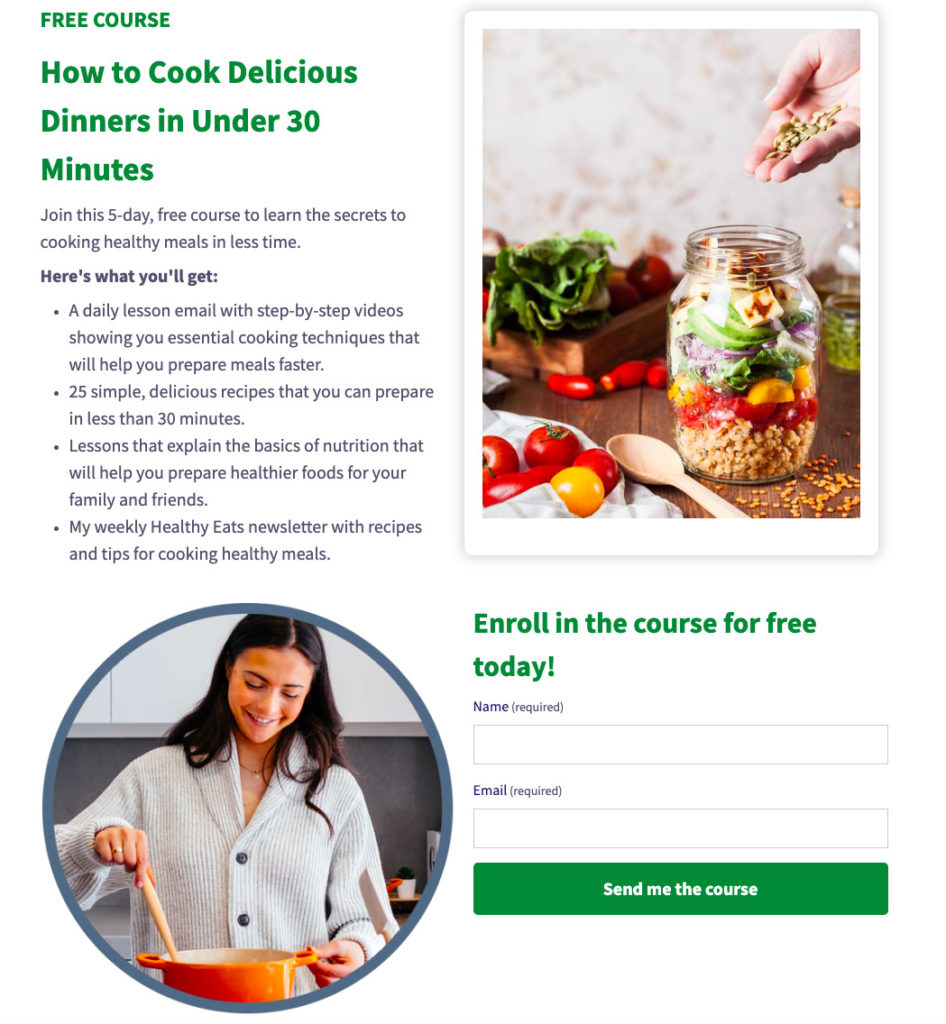
In this case, a visitor who gives you their email address to receive a 5-day email course on cooking healthy meals is probably interested in learning how to cook healthy meals.
Step #2: Get to know your subscribers by asking questions
To create effective email segments, you first need to know your subscribers. The more data you’re able to collect, the better you can target them.
Start by asking questions during your welcome series. Set up an automated campaign to trigger anytime a new subscriber joins your list. Include some questions with multiple choice answers that readers can easily click. Tag subscribers based on their answers. Voila!
Asking questions in a welcome series lets you collect information you need without asking for too much up in a sign up form.
Step #3: Create email segments based on purchase behavior
Effective email segmentation lets you cross-sell a customer other products they may be interested in. If a subscriber bought your training guide, follow up with them a few days later to say “thanks.” About a week later, send them a list of other similar training guides they may like.
You can also upsell. At the time of purchase or right afterward, you can offer “premiums” or “exclusive memberships.” These add-ons increase the average revenue of each sale. The purchase shouldn’t be the end of your transaction with a customer — it should be the beginning.
Step #4: Get feedback
Send your subscribers periodic surveys asking how they like your emails. This lets you better understand who your raving fans are — and get feedback from those who aren’t fully onboard.
Or, skip the survey entirely and get a quick temperature check with a sentiment widget, like the one below.
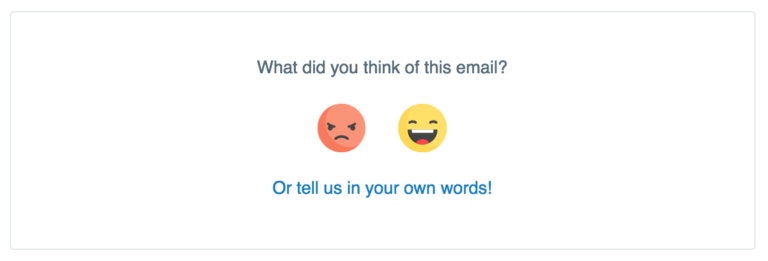
Track who clicks the “happy” image and who clicks the “angry” face. This will tell you a lot about how subscribers feel about your messages — and send appropriate messages to both groups.
Step #5: Create targeted segments based on email behavior
Try segmenting subscribers based on their behavior. This could include things like purchase history or email engagement. Sometimes the best way to get to know your subscribers is through their actions.
Let’s say you want to send similar recipes to a group of subscribers who liked your Avocado Black Bean Brownies. Create a segment of subscribers based on whether they clicked the link in your email.

Step #6: Track your results and make adjustments
Keep an eye on your email marketing metrics to gauge how your emails are performing. Have your open rates or click through rates changed since you started segmenting? How have your subscribers responded? Do you get any more or less engagement?
As is true with most marketing, you don’t know until you try. So test out a bunch of different segmentation strategies, see what works, and adjust what doesn’t.
Step #7: Re-engage inactive subscribers
Email segmentation is a great way to see who is not engaging with your content. You can segment out your subscribers who haven’t opened an email in, say, six months. Then you can try to win them back by triggering a re-engagement campaign.

After all, it’s a lot less work to reach out to a current subscriber than it is to add a new one.
Need more inspiration or advanced email segmentation techniques? Check out these 16 powerful ways to segment your list in AWeber.
Email segmentation best practices
As with all things email, best practices always come into play. It’s always good to test your campaigns and iterate as necessary to continuously improve.
The right data will allow you to get really tailored with your segments and send content that subscribers are more likely to respond to. Start collecting information from that first touchpoint and always look out for opportunities to get to know a little more about your audience.
Still have questions on segmentation? Drop ’em in the comments!
The post 7 Simple Steps to Get Started with Segmentation appeared first on AWeber.
from AWeber https://ift.tt/2qkVCQo
via IFTTT
No comments:
Post a Comment