You can deliver a wealth of value to your new subscribers in your welcome email without reinventing the wheel. How? With Google Analytics!
If you’re not using Google Analytics to track the traffic on your blog or website, stop reading this post now and get to trackin’. (Then come back to this post when you have some data, of course.)
Google Analytics tracks so much information that will help you be more successful. I recommend reading this guide from Moz if you are just getting started.
In this post, you’ll learn how to use Google Analytics to curate your best content, and also how to set up tracking codes to see how your email campaigns perform.
Determine your best evergreen content
Let’s assume you have Google Analytics on your site and you’ve been tracking data for a decent amount of time. Twelve months of data would be optimal, but anywhere from one to six months should be sufficient.
First, select your site’s profile and navigate to Behavior > Site Content > All Pages in the left sidebar. (Click these screenshots to see them at full size.)
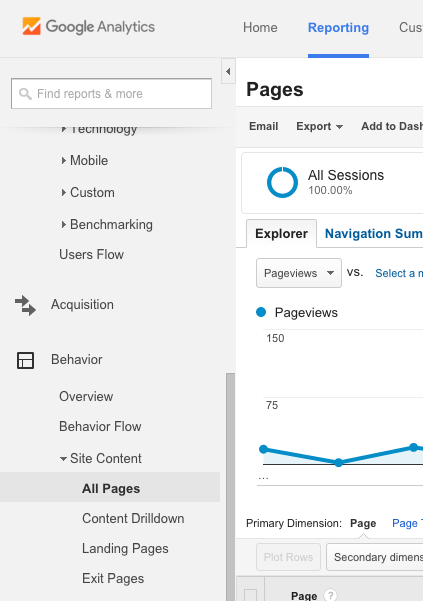
The All Pages view will display data on all of your pages.
These pages will be sorted by the most viewed pages descending. The default time period for Google Analytics is 30 days, so expect to see your most recent blog posts and published pages at the top. Also, expect to see things like “/” (your index, or homepage,) or “/page/2″ (or any pagination pages) in the list. We don’t want to use these for our welcome email.
If I change the date range to the previous month, you will see that the list changes dramatically.
Now, if I change the date range to be the entire length of the blog’s existence, I see even more popular posts rise up, along with a few I’ve seen before.
These views of traffic over time should give you a sense of what posts resonated the most with your audience, and over specific periods of time.
Now what should we do with this data?
Share those posts or pages
Setting up your automated welcome email using our new automation platform Campaigns is a breeze. We have a couple great posts and videos that explain what to include in your welcome email.
Here are some tips to consider:
- Welcome and thank them for joining,
- provide some details about the content they’ll receive in future emails,
- include a description of who you are and what you do,
- and provide your contact information.
These basics are great to establish the relationship that you are about to form with a new subscriber, but stopping here can lead to a dead-end. You haven’t given the subscriber a call-to-action, or a way to learn more about you.
Solve this by simply including a section that states: You might be interested in our most popular content. (Or some copy relevant to your audience.)
Pick three to five articles or pages from your curated Google Analytics lists that are still valuable and relevant to your target audience. It doesn’t matter how old the content is, as long as information is up-to-date and subscribers will benefit from it.
If you do not mind the manual maintenance, you could even title this section, “Check out last month’s most popular content,” and curate a new list each month.
Assume that subscribers are new to you and your brand, and give them more to help them get to know you, how you can serve them, and what to expect in the future.
Track email as a traffic source
Using UTM tracking codes on your links will allow you to capture and analyze email referral traffic within Google Analytics. Unless you are investing in paid digital advertising, you may not have experimented with using these. Here’s a quick overview on what UTM codes are, and how to start using them in your next email.
UTM codes, or parameters, are special tracking codes that are appended to normal links. Here’s an example of what one might look like for an AWeber campaign:
http://ift.tt/1MzT7dG
(Before you get frazzled – I’ll break down everything in the link above, and Google has a great tool for generating these easily.)
Tracking parameters
Source
Where did the click come from?
This could be something like “newsletter”, “octoberbroadcast”, or whatever you want to identify as the source of the traffic.
In my example, I used “welcomeemail”.
utm_source=welcomeemail
Medium
What is the medium of the source?
In our case, it’s an email. If you choose to only use UTM parameters for email campaigns, then you can default to email every time for medium. This would change if you wanted to track a cost-per-click campaign, and you tagged a URL with “cpc” as the medium.
(Let’s stick with email )
utm_medium=email
Content
What distinguishes the content?
In this case, let’s imagine our email promoting our new platform Campaigns has two Call-To-Action buttons, or CTAs. The first button is blue, and we know it appears in the upper quarter of the email. The second button is red, and appears by the footer. If we want to test which button is more effective at achieving a set goal, we must differentiate the two links with the Content parameter. (This post doesn’t get into setting up Google Analytics goals. It’s a bit more advanced, but incredibly powerful. I recommend this post by KissMetrics to learn more.)
Let’s assume our link is being generated for the blue CTA button.
utm_content=bluebutton
Campaign
What is this overall email campaign?
Google Analytics will track all data associated with this campaign across different mediums. So, if we run Facebook, cpc, and email campaigns for Campaigns, we’ll want to designate the utm_campaign to be ‘campaigns.’ Wow, that was a mouthful. Here’s the example:
utm_campaign=campaigns
Stringing it all together
When we string it all together, the URL looks like the regular link with a question mark at the end of it, followed by each parameter, joined by ampersands (&). Like this:
http://ift.tt/1MzT7dG
Again, Google has a great tool, which will cut down significantly the amount of time it takes to generate these, and help to ensure correctness.
If you tag all of your awesome welcome email links with a campaign parameter of “welcome”, and distinguish the links with the “content” parameter, you’ll be able to track the data in Google Analytics under Acquisition > Campaigns > All Campaigns.
Refine over time
Data is vital to measure past performance, but it’s important to remember that the real purpose of data (in my modest opinion) is to help us make more informed and profitable decisions for the future. Once you’ve developed a nice system to curating popular content, and tagging links to test their success, set up a regular reoccurring calendar request for yourself to peek in on performance and iterate as needed.
Your content, your business, and your audience will change over time, so it only makes sense that your email campaigns (even the automated ones,) will change over time as well.
This post only scratched the surface of what email marketers can do with Google Analytics. If this is an area of interest, let me know in the comments, and I’ll work to provide more relevant content that can help you #DoMoreWithEmail!
In the meantime, here are a few resources worth reading:
The Absolute Beginner’s Guide to Google Analytics – Moz
4 Google Analytics Goal Types That Are Critical To Your Business – KissMetrics
Email campaign tracking with Google Analytics – Smart Insights
Not an AWeber customer yet? Get started for free today!
The post How to Use Google Analytics to Create an AWesome Welcome Email appeared first on Email Marketing Tips.
from Email Marketing Tips http://ift.tt/1MzT7u3
via IFTTT
No comments:
Post a Comment